
Nowadays, businesses splash out on elaborate marketing strategies to reach out to prospective consumers and grow their consumer base. But at the end of the...

Key Takeaways
Newsletters, receipts, and work threads all land in the same inbox, and finding anything important means scrolling past everything else. You can learn how to filter emails in Gmail in a few minutes by creating rules that label, archive, or forward mail on your behalf, according to Gmail Help. When a rule is set, it keeps working in the background, so you stop repeating the same manual cleanup every single day.
Filters are created on the Gmail desktop site, but once you set one up, it applies across every device where you check that inbox.
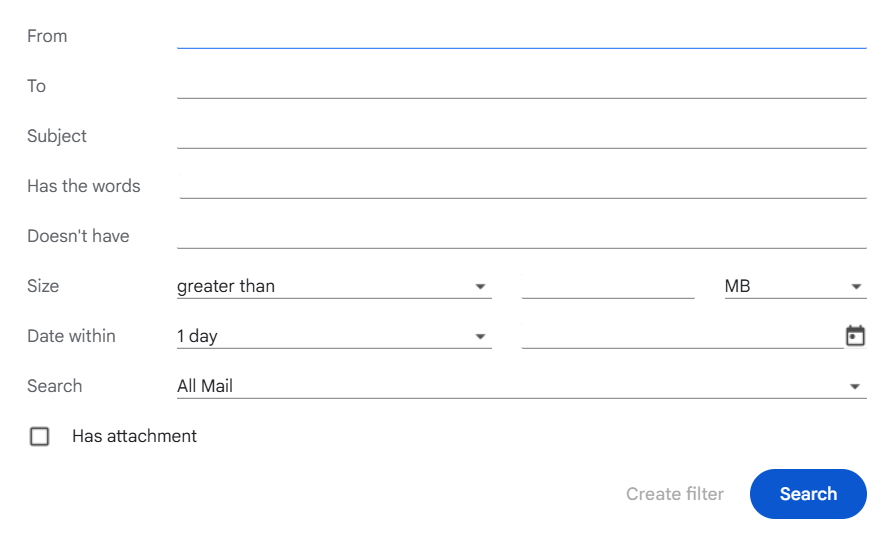
You can create a filter in two ways: from the search bar or from Gmail’s Settings menu. Both happen in a browser on the desktop site and lead to the same set of actions once your criteria are set. Which one you reach for usually comes down to whether you already have a sample email in front of you or you’re planning out several rules at once.
This route is the faster one when you’re staring at an email you want to build a rule around. Gmail fills in the sender and other details automatically, so there is less to type manually.
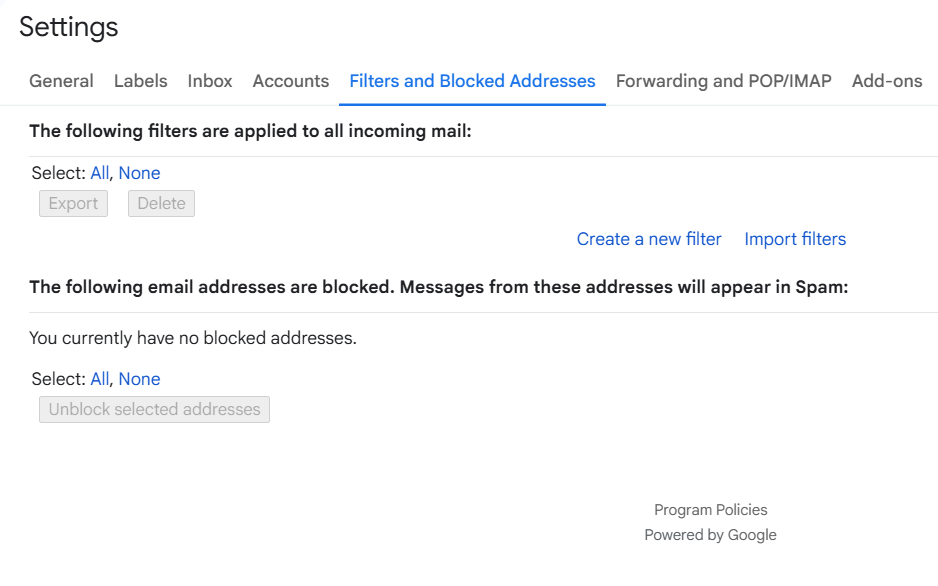
Settings is the better place to start when you are creating several filters at once, since you can see your existing rules right there and avoid creating duplicates or conflicting ones.
Once you set your criteria, Gmail gives you a list of actions to check off: Skip the Inbox (Archive it), Mark as read, Star it, Apply the label, Forward it, Delete it, Never send it to Spam, Always mark it as important, and Categorize it. You can combine several of these in a single filter.
Some actions are especially useful in specific cases. Never send it to Spam works well for trusted senders Gmail might misread, such as a client whose domain occasionally triggers spam checks. Always mark it as important is useful for a short list of people whose emails you can’t afford to miss, since it affects how Gmail’s Priority Inbox sorts messages. Categorize it sends messages into Gmail tabs like Promotions or Updates, if you use that layout.
The most common setup is Skip the Inbox paired with Apply the label, which moves newsletters or routine updates out of your main inbox while keeping them organized. Also, consider selecting Also apply filter to matching conversations. This applies the new rule to existing emails, not just messages that arrive after you save the filter.
The criteria fields decide which messages your filter will catch. It is worth setting them carefully, because a filter with loose criteria can sort, archive, or hide emails you actually wanted to see.
Use the From field to target a single sender. To catch every email from a company, enter the domain instead, like @company.com. This is useful when a vendor sends from several different addresses within the same domain, such as billing@ and support@. To match several senders at once, separate addresses with OR in capitals, or list multiple entries in the From field directly.
Use Subject for words that appear in the subject line, Has the words for anything in the message body, and Doesn’t have to exclude specific terms. Put an exact phrase in quotation marks when you want Gmail to match it precisely.
You can also combine terms with Gmail search operators to make filters more targeted. For example, you could catch emails with “invoice” in the subject while excluding messages that contain “draft.” Gmail Help’s guide to search operators explains the available options.
Type is:unread in the search bar to view only unread mail. This is a live search, not a saved filter, so it won’t run automatically in the background, but it’s a fast way to sort through unread messages before deciding which rules you actually need.
A few starter filters to set up:
Every filter you’ve created lives in one place: Settings, then Filters and Blocked Addresses. Revisit this list every few months, since a rule that made sense at first can start catching emails you would rather see directly, especially if your role or regular contacts change.
Select the filters you want to keep and click Export to save them as an XML file. From there, use Import filters to load that file into another Gmail account. This matters most if you manage more than one inbox with similar patterns, for instance, a personal and a work account, or if you’re an agency setting up several client accounts with the same baseline rules. Exporting once and importing everywhere saves rebuilding the same logic by hand each time.
Gmail’s mobile app has a major limitation: it does not let you create or edit filters on Android or iOS. There’s no workaround inside the app, so if you’ve been searching the settings menu on your phone looking for a filters option, that’s why you can’t find one.
You still have two options. Create your filters on a desktop, or open Gmail in a mobile browser like Chrome or Safari and request the desktop site. That gives you access to the same settings menu you would see on a computer. Once a filter is created, it applies across every device because it runs on Google’s servers, not on your phone.
What you can do in the app is search with operators, swipe to archive or delete, and apply labels manually to individual messages. These actions are useful for quick cleanup, but they do not replace a saved filter that handles the same task automatically.
A few well-built filters can make Gmail feel much less crowded. Set them up on the desktop site once, and they will keep labeling, archiving, and routing messages across every device you use.
Start with the biggest sources of clutter. Pick two or three senders you constantly move by hand, create filters for those, and build from there. The goal is not to organize every message perfectly, but to remove the repetitive cleanup that makes your inbox harder to use.
If your inbox problems go beyond one Gmail account, take a broader look at how you manage email volume, priorities, and daily cleanup habits. You can also find more practical email tips in our posts.
A label is a tag you attach to emails to organize them by category. A filter is an automatic rule that tells Gmail what to do with certain messages. Filters can apply labels, archive mail, mark messages as read, forward them, or delete them. Filters do the sorting; labels help you organize the results.
The most common causes are narrow criteria, conflicting filters, or a rule that only applies to new mail. Check whether the sender, subject, or keyword fields are too specific. Then review your existing filters to see if another rule is catching the message first, and re-run the filter against existing mail if needed.
Gmail allows up to 1,000 filters per account, which is more than most people need. The real issue is keeping them manageable. Too many overlapping filters can make it harder to understand where messages are going. A smaller set of clear rules is usually easier to maintain.
Yes. Gmail filters can forward matching emails automatically, but you need to add and verify the forwarding address first. Go to Settings, then Forwarding and POP/IMAP. Once the address is verified, it will appear as an available filter action.
Yes. Filters run on Google’s servers, so they apply across desktop, mobile, and other connected clients. You need the desktop site to create or edit them, but once they exist, they keep working everywhere you check that Gmail account.
Find quick answers to your questions about our pricing and plans.

Nowadays, businesses splash out on elaborate marketing strategies to reach out to prospective consumers and grow their consumer base. But at the end of the...
Unlike phishing, pharming works by corrupting DNS systems or device hosts files so that typing a correct address automatically routes users to fraudulent...

You’ve gathered a list of contacts for your email list. Maybe you’re starting a newsletter, or maybe you’re cold-emailing prospects to gain new clients. Now,...

Do you frequently open your mobile phone or laptop to check your emails? If you do, then you are not alone. Because studies show that...

Keep total bounce rates under 2% for a healthy sender reputation; anything above 5% indicates serious list quality issues. B2B and SaaS typically...
An MX record is a DNS entry that points incoming email to the correct mail server for your domain. Every MX record carries...
